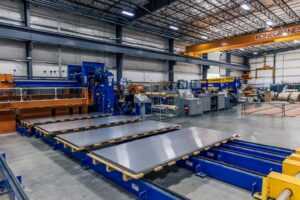
We would prefer it if all plates and sheets were “flat”. Unfortunately, the reality is quite different, and the standard commercial specifications for producing these products recognize this reality.
The requirements for the flatness of plate and sheet products sold by Rolled Alloys vary considerably by the type of product, alloy, thickness, and size of the piece.
AMS and ASTM standards cover the flatness requirements for most plate and sheet items produced by the mill. Specifications ASTM A480 and AMS 2242 cover many of the stainless-steel flat products. It is important to remember that these tolerances apply to mill-produced products.
Flatness tolerances for sheet are published only for “full size” sheets. Since Rolled Alloys coil level product, we work to the mill tolerances. In general, 60″ wide and under sheets are no more than ½” out of flat when laid on a flat surface.
Plate can be out of flat for several reasons. First, when plates are hot rolled, they are subject to uneven cooling. As plates cool, they will distort from the flat condition they appeared to have while being rolled. Annealing the plates will add further distortion. The flattening equipment restores the flatness of the plate within limits by adding more residual stresses.
Second, since the finished mill plate is only “flat” because of the residual stresses imposed to hold it in place, anything that relieves those stresses will lead to a less flat plate. Cutting the plate into smaller sections, exposing it to heat (plasma cutting or welding), or machining away surfaces all relieve stresses that can affect flatness. For this reason, plates cut from mill master plates are not subject to the same tolerances on flatness. There are technically no tolerances for such products, but we generally attempt to hold the mill tolerances for cut pieces.
The flatness requirements in ASTM A480, for plates produced to ASTM A240, were simplified to a 36″ rule. The method of measurement is to place a 36″ rule on the concave side so both ends of the rule are in contact with the surface of the plate. The gap between the surface of the plate and the rule is not to exceed the specified limits as in Table A2.20. Below is an abbreviated version of Table A2.20.
| Specified Thickness (t), in. | Flatness Tolerance for Thicknesses Given, in. |
|---|---|
| t < ¼ | 7/16" |
| ¼ ≤ t < 3/8 | 3/8" |
| 3/8 ≤ t < 1 | 5/16" |
| 1 ≤ t | 1/4" |
Two additional notes are that if the longer dimension is under 36″, the tolerance is ¼” If the minimum specified yield strength of the material exceeds 35 ksi, the values are multiplied by 1.5. This yield strength caveat would apply to materials such as RA253MA®, AL-6XN®, 2205, and 17-4 PH. The AMS tables on flatness vary depending on length and width but result in similar allowances.

The flatness issues for nickel alloy products are even more convoluted. This is partly because, historically, different mills produced their proprietary alloys to match their capabilities. Although most of these materials are now in the public domain, they are still produced to separate ASTM specifications, and the actual requirements can vary from one alloy to another. AMS tolerances for nickel alloys are uniform and apply to nickel alloy plate products. However, these tolerances are also broad. For example, a 96″ wide, ¼” thick Alloy 625 plate could deviate from flat by as much as 2.44″. Fortunately, these products are typically produced to more reasonable levels of flatness and usually meet the flatness requirements used for stainless steel. It is important to remember that many nickel alloys are also higher-strength materials with a minimum specified yield strength exceeding 35 ksi.
From an end-user point of view, several things should be kept in mind relative to plate flatness. First, when a plate is cut into smaller pieces, it will not be any flatter than what was initially supplied by the mill. Since cutting relieves stress, it is likely to be less flat. For this reason, the flatness tolerances that apply are those that applied to the original mill plate, not the cut size. It is important to be familiar with the flatness allowances permitted in the basic specifications. If these tolerances are too large for the intended application, some consideration must be given to identifying a means to bring them into tolerance for the intended use. This could involve press flattening, hand working, or machining. Any mechanical work to improve flatness should be done at room temperature.
Second, since the availability of true flat or square bars is declining, more of the requirements for these products are being replaced by stripping plate products. While there is little or no difference between true flat bar and plate materials regarding mechanical and heat or corrosion-resistant properties, these two products have some physical differences. Size tolerances on true bar products are smaller than plate products. This is because true bar products are smaller than large mill plates and are produced on equipment with better control over the width and thickness. The camber (edge curvature), flatness, and twist of these smaller sections can be controlled. On flat bar products stripped from plate, the flatness is dependent upon the original plate flatness plus the amount of distortion that occurs due to stress relaxation when they are stripped. Camber and twist can also result from stress relaxation and cannot be controlled. Depending on the width and thickness of the strips being produced, they may be candidates for an optional machine straightening operation. However, this technique is restricted to thicknesses under ½” and widths under 8″.
Finally, plate products are used more frequently as machining stock, replacing forgings or castings that require more significant stock removal. The advantages are lower costs and better availability. In addition, rising raw material costs drive end users toward lighter gauge raw materials. While plate products are a more economical choice for many of these applications, the potential variation in flatness and the clean-up allowance required to remove the hot-rolled surfaces cannot be ignored. An allowance of 0.040″ per side is generally needed to remove the hot-rolled surface. While hot-rolled plate products are usually on the heavy side, they are permitted to run as light as 0.010″ under the nominal thickness. Add a potential out-of-flat condition of as little as 1/8″, and a 1″ plate might not clean up until it is 0.670″ thick.
Please contact the Rolled Alloys Metallurgical Services group at 1-800-521-0332 or submit your questions below.
Buy Online Anytime
Our dashboard makes it even easier to shop online anytime from anywhere. Quote, buy, and track 24 hours a day.

Trade Shows
Come talk to a Rolled Alloys representative in person about your project. You can find us at these trade shows.

March Mania 2025
Every Online Order in March is a Chance to Win One of 8 Great Prizes!

Instant Pricing on Nickel, Stainless Steel, Duplex, and Titanium
Get real-time pricing and availability for nickel, stainless steel, duplex, and titanium—all in one place.
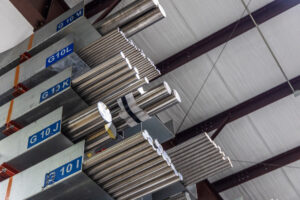
New and Expanded Stock for 2025
New Titanium, Stainless, Nickel and Cobalt in Stock Now – CP Ti Grade 2, 635, 718 and More!

History and Uses of Alloy 800
Discover the evolution of Alloy 800, from its origins during the 1950s to modern derivatives like Alloy 800H/800HT. Learn about its high-temperature strength, petrochemical applications, and commercial availability today.
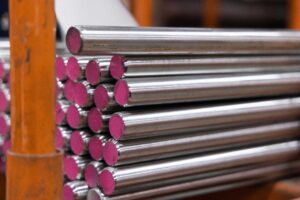
New Bar Stock Available
New Round and Flat Bar Products in Stock at Rolled Alloys


